How to Generate and Document APIs with Postman

I am a self-driven technical writer experienced in scoping technical content, leading technical documentations, and contributing to open-source projects. I am always driven by new knowledge, and I explore how technology revolutionizes our daily activities. My skills embody the finesse of art, science, and persuasion.
Postman is a popular API development and testing platform that software developers use to test and document their APIs. Generally, APIs are the bridge between applications, allowing them to interact with each other through specific commands and functions. However, APIs can be complex, and documenting them properly is essential for using them correctly in multiple applications.
Postman makes documenting APIs easy with its intuitive user interface, straightforward workflow, and pre-defined templates. It enables rapid development and debugging of APIs, as well as documenting them accurately for future use. Also, documenting APIs with Postman can provide teams with an easy way to share their API specifications with other developers and stakeholders.
Over my years of experience documenting APIs, Postman has become my go-to tool. In this article, I'll show you how to use Postman for documenting APIs by providing a step-by-step guide. Let's get started.
Start by Launching Postman
After signing up and logging into Postman, you'll be presented with the main dashboard. This is where all your API requests and documentation will be available. Now we can start documenting our APIs.

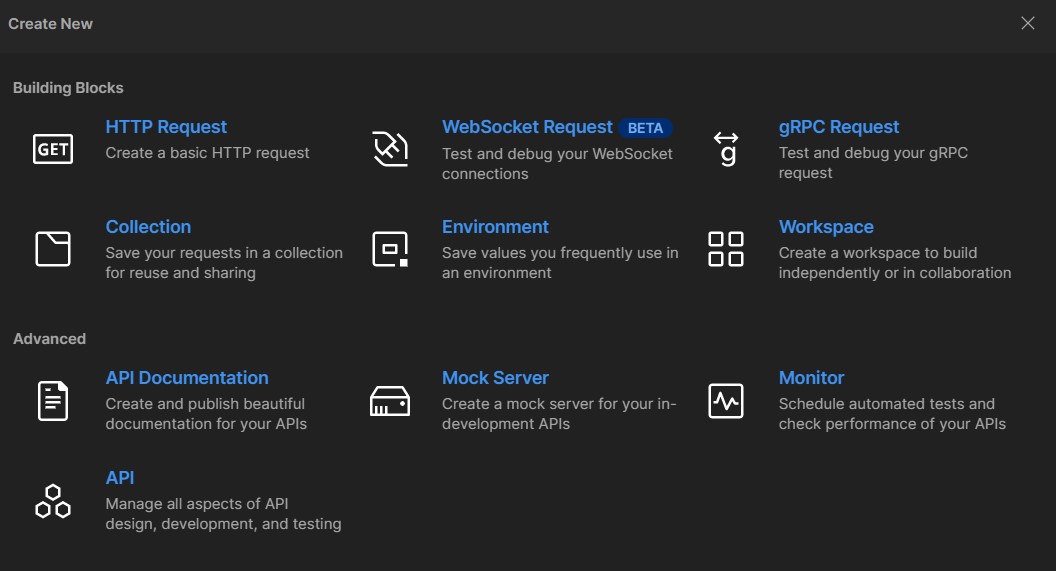
Create a New Collection
A collection in Postman is a set of API requests grouped to form an API project. To create a new collection, click the "New" button on the top left corner and select "Collection."
Name the collection and add a description, then click Create. You can now start documenting your API requests within this collection.
Create an API Request
Next, create an API request for documenting the API. To do this, select the collection you just created and click the "+" icon next to it. You'll see a pop-up window where you need to fill in the details about the API request.
Fill out all the required information, including a name for the request and its associated URL. Then select an HTTP method from the dropdown list (e.g., GET, POST, PUT, etc.) and add any additional headers and parameters if necessary. Once you're done, click "Send" to submit the API request.

Add API Documentation
Now it's time to document your API requests. With Postman, documenting APIs is easy with its autogenerated API documentation feature. To do this, click the "View Documentation" button at the top-right corner of the Postman window.
You'll be presented with a live preview of your API documentation. Here, you can fill in any extra information about the request and add data samples for better understanding. You can also add an example response from the API if needed. After documenting, click the "Save" button to save your changes.

View Documentation
You can view the completed documentation for your API request. Simply select the collection from the left panel and click on the " View Documentation" tab. Here you'll find a comprehensive overview of your API request with all its associated information.

Share Documentation
You can also share your API documentation with other developers and stakeholders. To do this, click the "Publish" button on the top-right corner of the Postman window. You will see a dialog box where you can generate URLs for sharing and email the documentation directly to anyone you want.

Start Documenting Your APIs today!
Postman is a great tool for documenting APIs quickly and easily. With its simple workflow and intuitive user interface, documenting APIs with Postman takes just a few minutes. You can also share your API documentation with other stakeholders so they can use it to develop their applications without any confusion. So start documenting your APIs with Postman today!


